
Why tagging matters (and how to actually do it well)

Photo by Markus Spiske on Unsplash
When businesses talk about “getting better data”, tagging is usually where things quietly fall apart.
Tags are added reactively: new campaign, new page, new event — someone throws a tag in. Six months later, the dataset is a mess of duplicated events, inconsistent naming, and half-useful metrics that no one fully trusts.
If you’ve ever tried to audit a GA4 setup or build a funnel analysis only to realise that “button_click” means four different things depending on which page it fires on, you’ve seen the result of unplanned tagging.
Good tagging is less about tools and more about thinking.
What we mean by “tagging”
Tagging is how you record what people actually do on your site — not just that they visited.
A tag is a small snippet of tracking code (often managed through tools like Google Tag Manager) that fires when a user takes a specific action (aka a trigger action) — viewing a page, clicking a button, submitting a form, watching a video, and so on.
Each tag sends information that you specify to your analytics tools (GA4, PostHog, etc.), where it can be turned into metrics and reports. Within well designed tags, you will pass meta data alongside the actual event data, which helps to add context during analysis.
In simple terms: tagging turns anonymous pageviews into a story about user behaviour.
Without it, you’re flying blind — you know how many people arrived, but not what they did or why they left.
Why tagging properly matters
Tagging isn’t just about collecting data — it’s about giving structure to how you understand your users.
A solid tagging strategy helps you:
See where people are dropping off in a journey.
Identify which actions correlate with conversion or retention.
Design experiments that are actually measurable.
Avoid wasting time reconciling broken event names or missing properties later.
Bad tagging, on the other hand, does the opposite: it leaves teams guessing, it slows analysis, and it breaks trust in data.
Where to start
If you already have GA4 (or a similar alternative) installed, you’ve technically got some tagging in place — but probably not the kind that helps you answer useful questions.
GA4’s automatic tracking (page views, scrolls, outbound clicks, file downloads) is fine for a baseline, but it doesn’t capture your key actions — the ones that actually move your business forward.
To start building a meaningful tagging setup, focus on three simple steps:
Define your critical actions
Identify what success looks like on your site. That could be submitting a form, signing up for a demo, adding an item to cart, or engaging with key content.
Don’t list everything a user could possibly do — list what matters most to your funnel.Map those actions to user intent
For each action, ask: what does this tell us about the user?Clicking “Book a Call” = intent to convert
Downloading a brochure = research phase
Viewing pricing = high purchase intent
This helps you prioritise which tags add the most insight.
Build one journey at a time
Rather than tagging your entire site in one go, start with a single user journey
e.g. from homepage → product page → enquiry form → thank you page.
Tag that flow properly, test it, and use the results to refine your approach before expanding across other journeys.
The goal at this stage isn’t to have a perfect setup — it’s to create useful structure. Once you can reliably track how users move through one key journey, scaling that structure to the rest of your site becomes far easier.
Structuring a tagging specification
A tagging specification is your blueprint — the single source of truth that defines what gets tracked, how, and why.
At minimum, it should include:
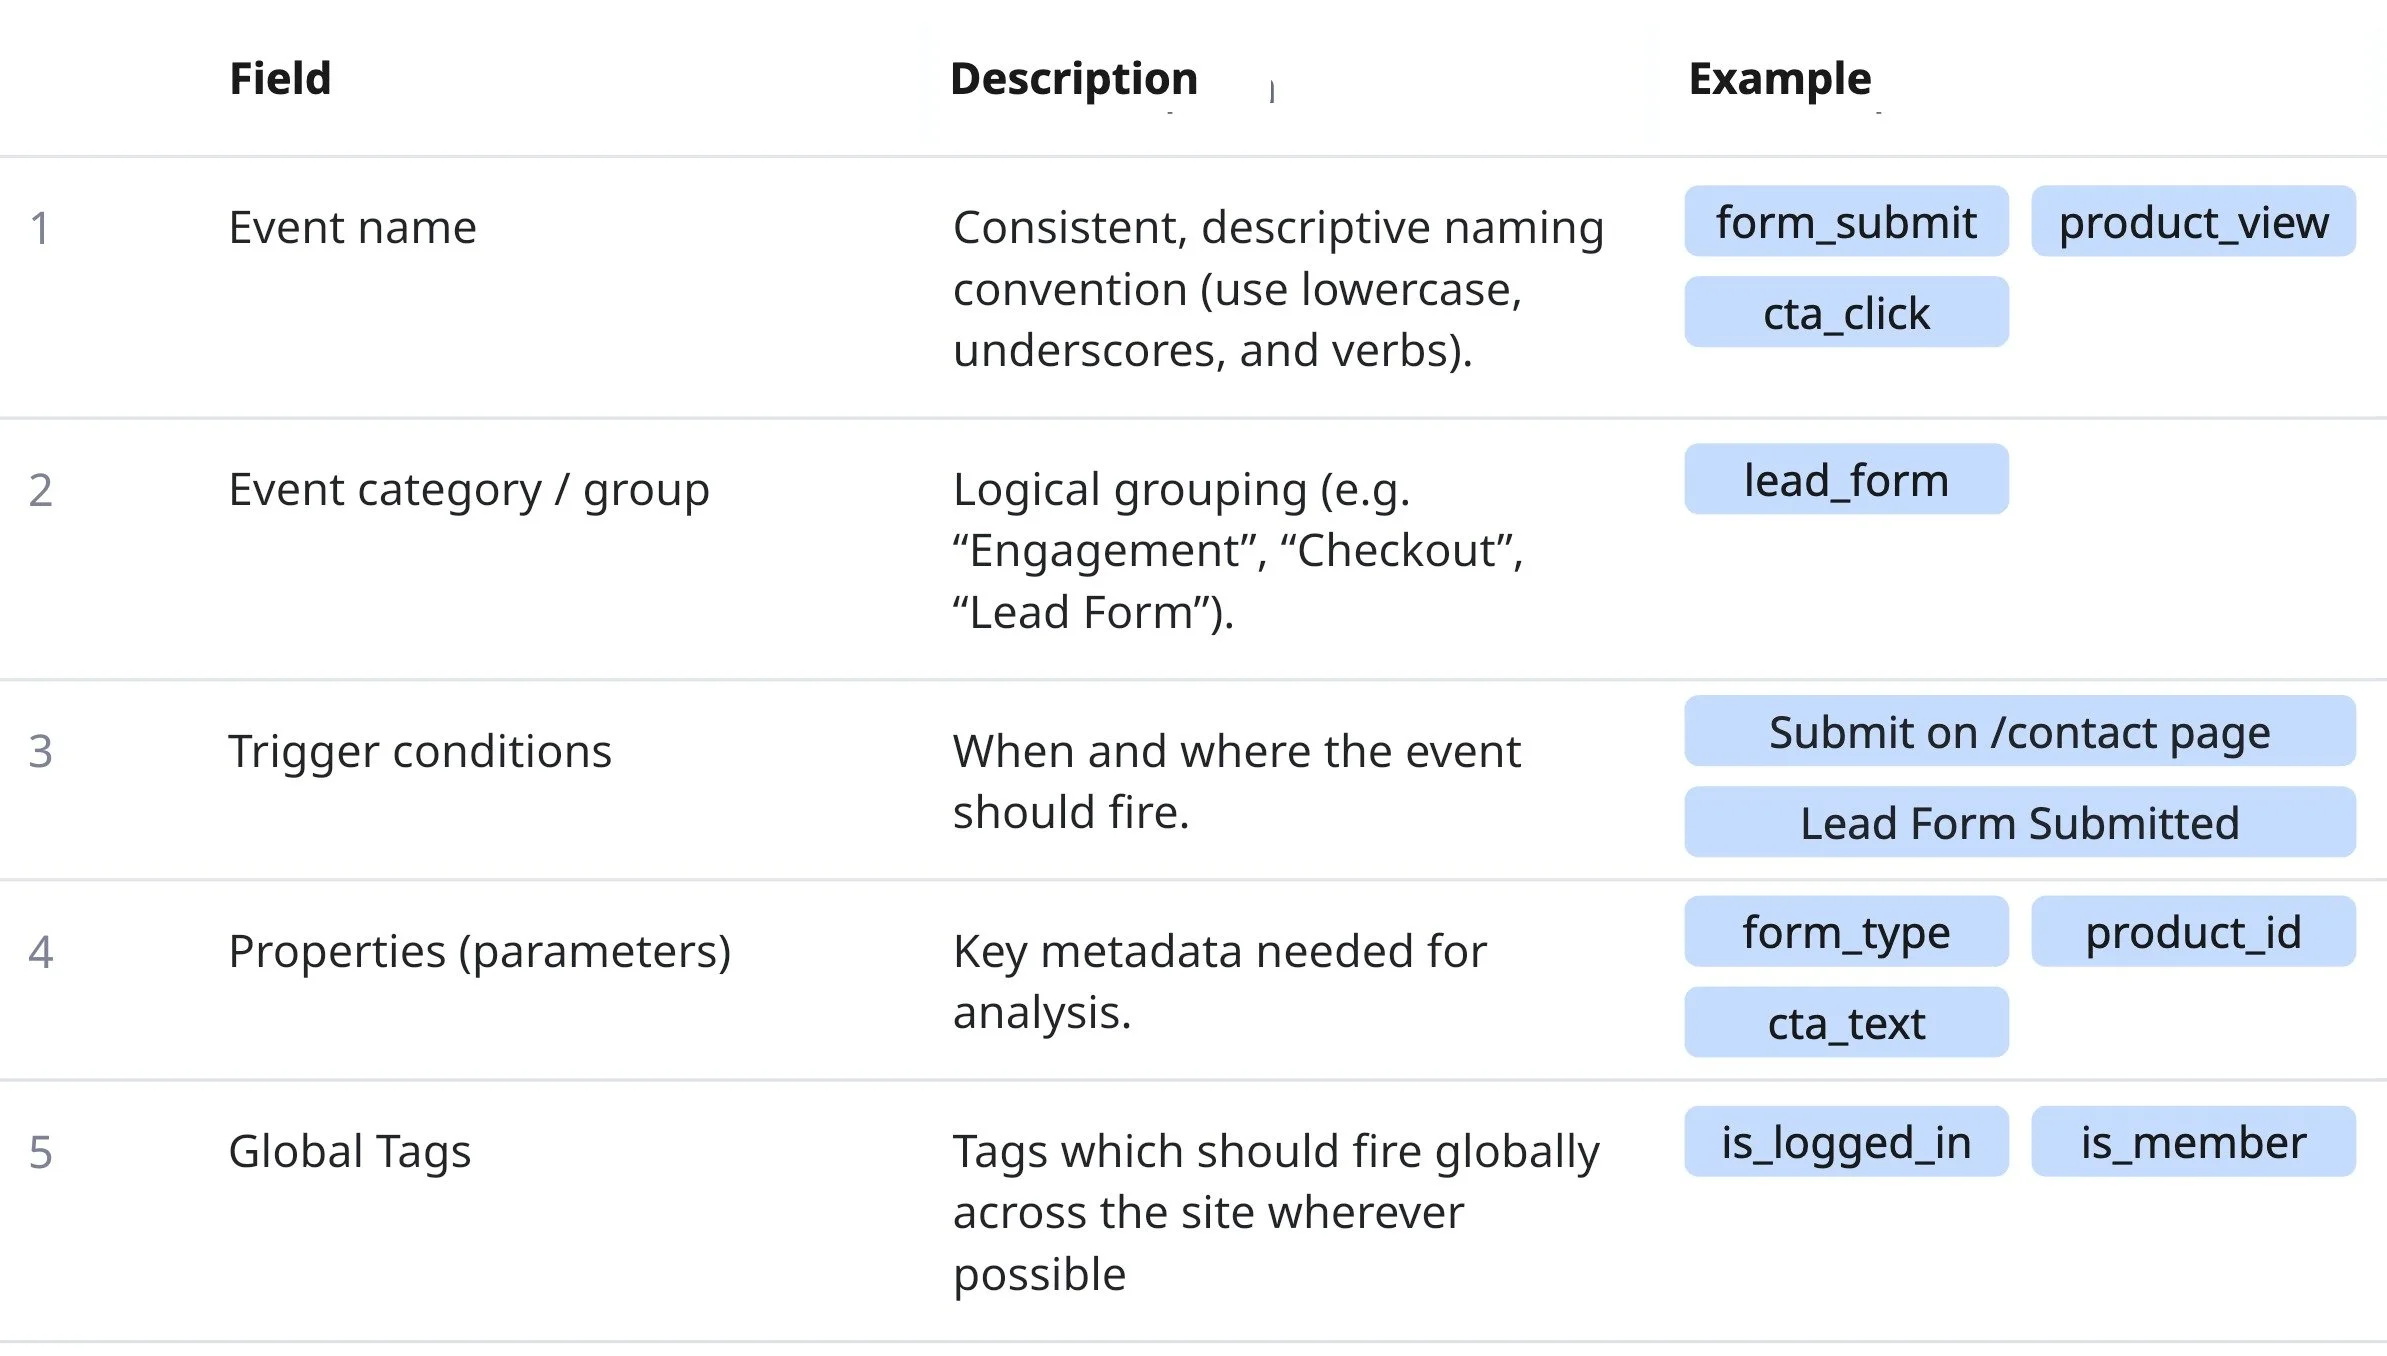
Example tagging structure.
Keep it clean, consistent, and centralised. Store it somewhere visible — not hidden in a single GA4 admin or buried in an agency’s documentation.
Don’t worry if this feels overwhelming at this point, we’re here to help — reach out on the contact form below if you need guidance with setting up your tagging structure.
Documenting and auditing your tagging setup
Without a single place that shows what’s been implemented, how it was configured, and what it connects to, teams end up guessing — and “guessing” is the fastest way to break your data.
At candid, we build every tagging implementation visually in Miro before it goes live. It acts as a living map of the user journey and each event’s role within it.
That map becomes the reference point for both marketing and development teams — it’s how we ensure what was planned is what’s actually firing.
A good tagging map should show:
Each stage of the user journey (from first touch through to conversion).
The key events and parameters firing at each stage.
Which data layer variables or triggers power those tags.
Links to GTM or GA4 configurations for easy auditing later.
Once implementation is live, auditing is the next critical step. Don’t assume that because a tag fired once in GTM preview, it’s working perfectly.
Check your live data regularly:
Validate events in GA4’s real-time and debug views.
Confirm that property names and values match your spec.
Look for unexpected duplicates or missing parameters.
Periodically review whether each tag still adds value.
Auditing shouldn’t be a one-off exercise — it’s part of maintaining data quality.
We typically re-audit tagging setups quarterly or whenever a major site change is released.
Documenting and auditing like this creates accountability. It means that six months from now, when someone asks “what does this event mean?” or “why isn’t this metric updating?”, you have clear answers.
An Example: tagging from journey to event
Let’s say your lead journey goes:
Landing page → Form start → Form complete → Thank you page
A clear tagging plan would look like this:
form_start— fires when the form loads, or the first field is interacted with.form_progress— optional (but recommended) step-level events if you need to see drop-off points.form_submit— fires when the form is successfully sent.thank_you_view— fires on confirmation page load, to track completion rate.
Those four simple events tell you everything you need to begin measuring conversion rate, friction points, and form abandonment.
Depending on the maturity of your tracking implementation, you may want to push this further and track interactions at greater granularity, but for most businesses this is a great place to start.
Final thought
Tagging is the bridge between user behaviour and decision-making.
If you treat it as a checklist, your data becomes noise.
If you treat it as a strategy, your data becomes insight.